-
Flutter_13. Dropdown and Validation> Frontend/Flutter 2023. 5. 8. 19:07
0. 학습 내용.
- Dropdown Button and DropdownMenuItem를 활용해 Drop-down 만들기
- Validation 만들어 빈칸 체크
- Modal에서 Save 버튼 클릭시, 새로운 Expense 추가.
1. Dropdown Button and DropdownMenuItem
... 생략 DropdownButton( //initial data: value: _selectedCategory, // DropdownMenuItem: need to set the child parameter to another widget, which simply defines what will be shown on the screen. items: Category.values .map((category) => DropdownMenuItem( // save internally: value of selected category value: category, child: Text( category.name.toUpperCase(), ), )) .toList(), onChanged: (value) { // the value here is value from map of DropDownMenuItem if (value == null) return; setState(() { _selectedCategory = value; }); }, ), const Spacer(), ... 생략- 기본적으로, items 와 onChanged 로 나뉨.
- 아래와 같이, value는 초기값으로 위에서 설정.
Category _selectedCategory = Category.leisure;- items는 drop-down list에 보이는 각 아이템을 의미
- onChanged는 drop-down list에 item을 선택할 떄, 실행되는 함수.
- enum으로 설정한 Category의 values를 map으로 iterate 하면서 DropdownMenuItem 을 return 한다.
- DropdownMenuItem는 각 item을 의미하며, value는 catgory로 지정, child는 각 item 값을 의미
- onChanged는 DropdownMenuItem에서 등록한 value 값을 받는데, 이를 setState로 설정하여 _selectedCategory에 대입
2. Validation 체크
onPressed: _submitExpenseData,- Save Expense 버튼을 클릭 시, _submitExpenseData 함수 실행
... 생략 void _submitExpenseData() { // able => double & else => null; final enteredAmount = double.tryParse(_amountController.text); final amountIsInvalid = enteredAmount == null || enteredAmount <= 0; if (_titleController.text.trim().isEmpty || amountIsInvalid || _selectedDate == null) { showDialog( context: context, builder: (ctx) { return AlertDialog( title: const Text('Invalid Input'), content: const Text( 'Please make sure a valid title, amount, date and category was entered.'), actions: [ TextButton( onPressed: () { Navigator.pop(ctx); //close modal }, child: const Text('Okay')) ], ); }, ); return; //no code executed } ... 생략- amount 가 없거나, 0보다 작은 경우 false.
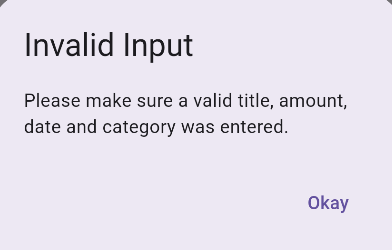
- showDialog widget은 JS의 Alert함수 처럼, 팝업창을 띄워준다.
- showDialog widget은 context와 builder를 받고, builder에서는 showDialog widget의 title, content, actions 처리가능
- actions의 경우, Okay 버튼을 누르면, 해당 화면을 pop(꺼지게)한다.
- 마지막으로 return;을 해줘서 아래 내용이 실행안되게 한다.
3. Modal에서 Save 버튼 클릭시, 새로운 Expense 추가.
...생략 class NewExpense extends StatefulWidget { const NewExpense({super.key, required this.onAddExpense}); final void Function(Expense expense) onAddExpense; ...생략- Constructor에 onAddExpense 를 받아 부모에서 내려주는 함수 사용.
void _openAddExpenseOverlay() { showModalBottomSheet( // isScrollControlled: will take full available height. isScrollControlled: true, context: context, // context ,which is full of meta-data, holds information about expenses widget in the end and its position in the widget tree builder: (builderContext) { // builder basically means that you must provide a function as a value. (return a widget that should basically be displayed when Flutter renders this mbs is opening up) return NewExpense(onAddExpense: _addExpense); }); } void _addExpense(Expense expense) { setState(() { _registeredExpenses.add(expense); }); }- 부모에서 내려주는, 함수로 onAddExpense: _addExpense 연결
- isScrollControlled에 true로 지정하면 modal의 내용을 키보드가 안가리게 설정한다.
}, child: const Text('Okay')) ], ); }, ); return; //no code executed } widget.onAddExpense(Expense( title: _titleController.text, amount: enteredAmount, date: _selectedDate!, category: _selectedCategory)); Navigator.pop(context); }- Okay 버튼을 클릭후, widget을 통해 NewExpnse에 있는 함수를 사용한다.
- 함수 후, Navigator.pop을 써서 modal 을 pop한다.
'> Frontend > Flutter' 카테고리의 다른 글
Flutter_14. Theme in Widget & Dark Mode & Named Constructor & For in (0) 2023.05.12 Flutter_14. Dropdown and Validation (0) 2023.05.09 Flutter_12. DatePicker (0) 2023.05.06 Flutter_11. App bar & Modal &Text Field (Input tag) (0) 2023.05.04 Flutter_10. Custom List & Formatting Data (0) 2023.05.03